🎉 Up to 70% Off Selected ItemsShop Sale
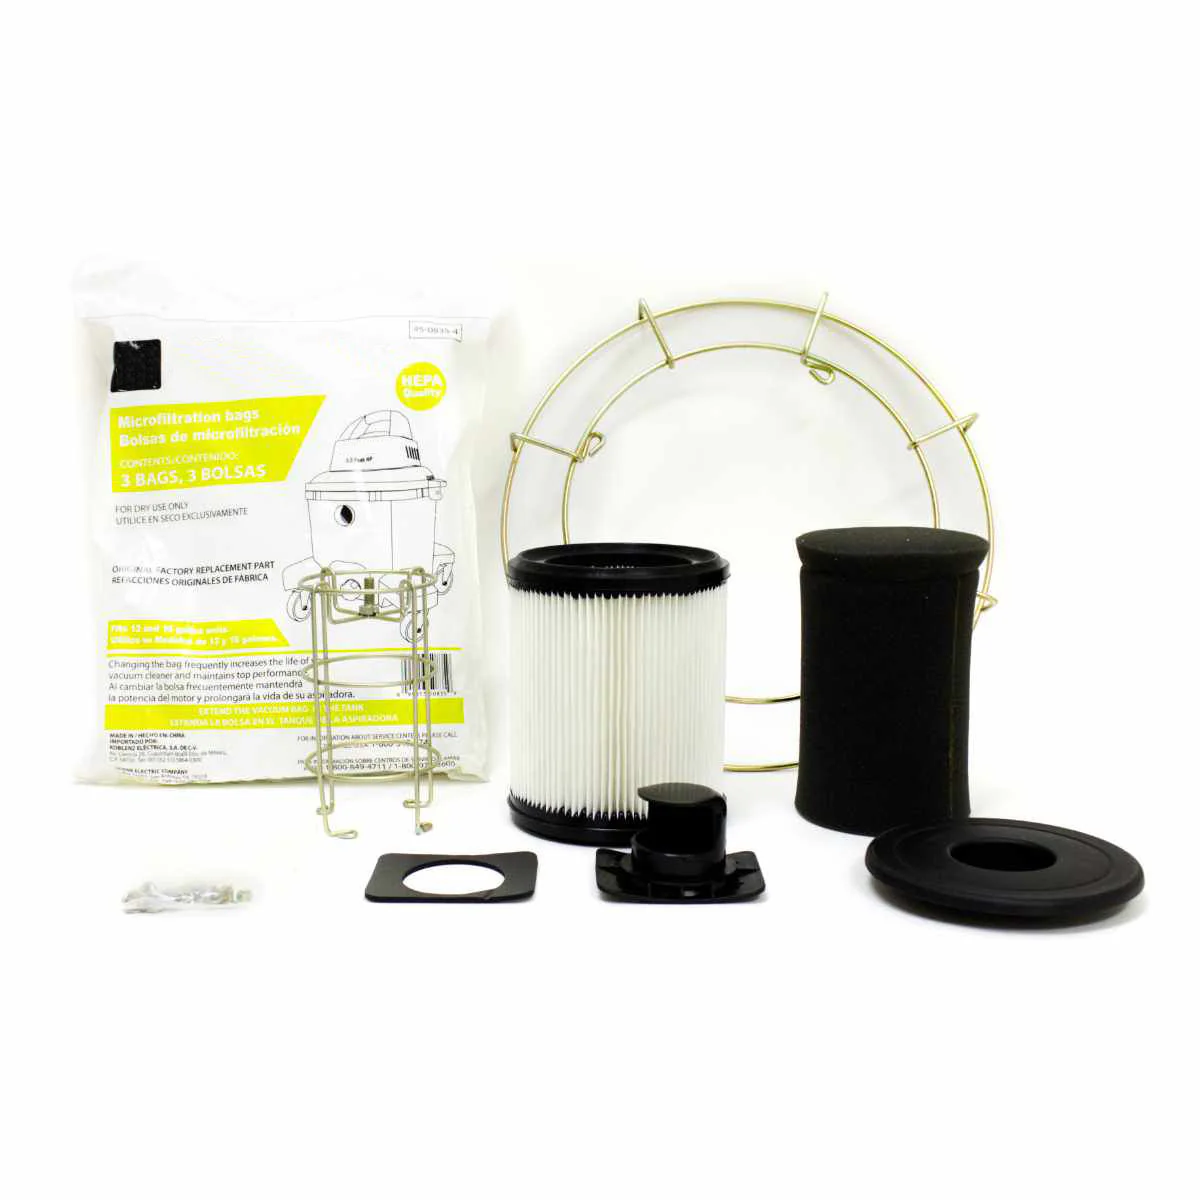
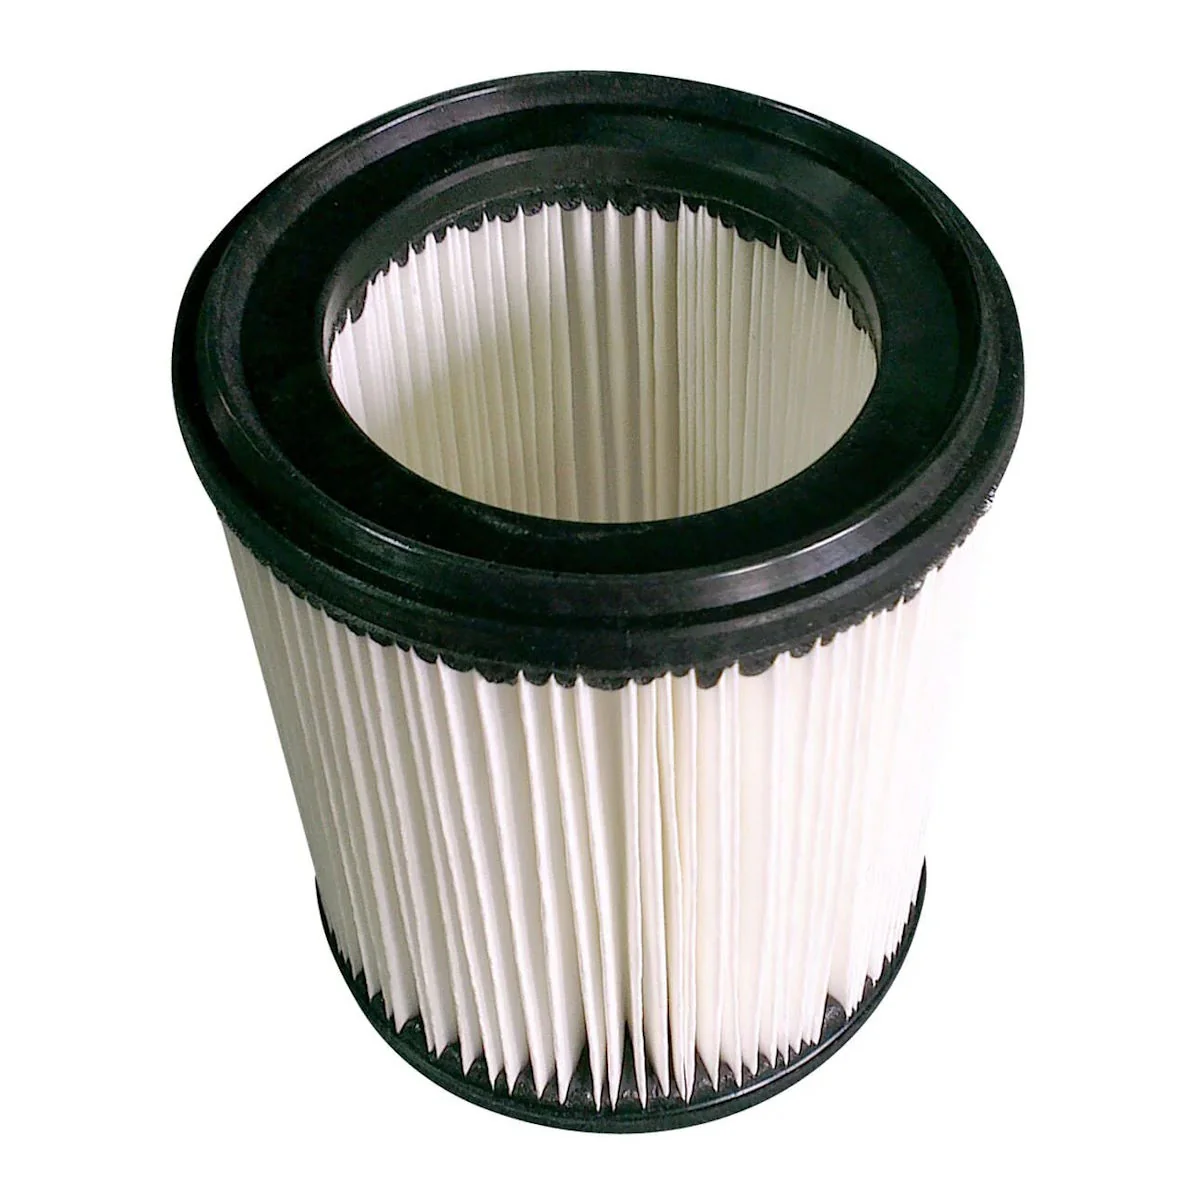
HEPA Filter Kit (#45-0854-5) for the CleanFreak® 19 Gallon Wet / Dry Vacuum
This HEPA Filter is an optional accessory for the CleanFreak 19 gallon wet / dry vacuum. It is essentially used in place of the dry cloth filter bag that comes standard with the vacuum. It is used for very fine recovery where you don't want to be reintroducing fine particulate back into the air through the exhaust of the vac motor. This kit also comes a 3 pack of microfiltration bags that help with containing and disposing of fine particles. Also, this kit comes with a non-HEPA foam filter which is to be used to protect your motor from debris when vacuuming up liquids.
Please Note: Both the foam filter and the microfiltration bags are NOT meant to be used with the pleated HEPA filter. Please follow the packaged instructions accordingly.
Please Note: Both the foam filter and the microfiltration bags are NOT meant to be used with the pleated HEPA filter. Please follow the packaged instructions accordingly.
Includes
- HEPA pleated Filter
- 3 microfiltration Bags
- Foam Filter
- Filter Cage
- Aligning Cage
- Filter retainer
- Replacement coupling for microfiltration bags
- Replacement Coupling Seal
Instructions
HEPA Filter
For Dry Vacuuming
For Dry Vacuuming
Foam Filter
For Wet Vacuuming
For Wet Vacuuming
Microfiltration Bags
For Dry Vacuuming
For Dry Vacuuming
Pleated HEPA Filter
 |
 |
||
| 1. Pull the tank latches to release the vacuum head from the tank. | 2. Turn the vacuum head upside down and remove the foam filter. | ||
 |
 |
||
| 3. Unscrew the 4 screws that hold the large metal cage. | 4. Unscrew the 4 screws that hold the float cage. | ||
 |
 |
||
| 5. Note that the 4 screws that hold the larger cage are longer than the ones that hold the float cage. |
6. Transfer the Float to the new filter cage. | ||
 |
 |
||
| 7. Screw on new float cage using the shorter screws. |
8. Screw on the new larger cage. | ||
 |
 |
||
| 9. Place the HEPA pleated filter over the float cage. |
10. Secure the HEPA Filter using the filter retainer and the washer & wing nut. | ||

|
|||
| 11. Place the vacuum cleaner head back into position and secure it with the latches. | |


$26.25
Original: $74.99
-65%HEPA Filter Kit (#45-0854-5) for the CleanFreak® 19 Gallon Wet / Dry Vacuum—
$74.99
$26.25Product Information
Product Information
Shipping & Returns
Shipping & Returns
Description
This HEPA Filter is an optional accessory for the CleanFreak 19 gallon wet / dry vacuum. It is essentially used in place of the dry cloth filter bag that comes standard with the vacuum. It is used for very fine recovery where you don't want to be reintroducing fine particulate back into the air through the exhaust of the vac motor. This kit also comes a 3 pack of microfiltration bags that help with containing and disposing of fine particles. Also, this kit comes with a non-HEPA foam filter which is to be used to protect your motor from debris when vacuuming up liquids.
Please Note: Both the foam filter and the microfiltration bags are NOT meant to be used with the pleated HEPA filter. Please follow the packaged instructions accordingly.
Please Note: Both the foam filter and the microfiltration bags are NOT meant to be used with the pleated HEPA filter. Please follow the packaged instructions accordingly.
Includes
- HEPA pleated Filter
- 3 microfiltration Bags
- Foam Filter
- Filter Cage
- Aligning Cage
- Filter retainer
- Replacement coupling for microfiltration bags
- Replacement Coupling Seal
Instructions
HEPA Filter
For Dry Vacuuming
For Dry Vacuuming
Foam Filter
For Wet Vacuuming
For Wet Vacuuming
Microfiltration Bags
For Dry Vacuuming
For Dry Vacuuming
Pleated HEPA Filter
|
|
||
| 1. Pull the tank latches to release the vacuum head from the tank. | 2. Turn the vacuum head upside down and remove the foam filter. | ||
|
|
||
| 3. Unscrew the 4 screws that hold the large metal cage. | 4. Unscrew the 4 screws that hold the float cage. | ||
|
|
||
| 5. Note that the 4 screws that hold the larger cage are longer than the ones that hold the float cage. |
6. Transfer the Float to the new filter cage. | ||
|
|
||
| 7. Screw on new float cage using the shorter screws. |
8. Screw on the new larger cage. | ||
|
|
||
| 9. Place the HEPA pleated filter over the float cage. |
10. Secure the HEPA Filter using the filter retainer and the washer & wing nut. | ||
|
|
|||
| 11. Place the vacuum cleaner head back into position and secure it with the latches. | |